The How to Connect Mobile Gaming Corps Switch Controller to PC is a game-changer for those seeking precision and comfort in their gaming setup.
This controller can easily elevate your PC gaming experience, whether you’re diving into action-packed adventures or platformers. Connecting it to your PC is simple and hassle-free.
In this guide, we’ll walk you through the best methods to connect your Mobile Gaming Corps Switch Controller, covering wired, wireless, and Steam setups. Keep reading to get started with a smooth, responsive gaming session on your PC!
Wired vs. Wireless Connection – Which One Should You Choose?
Choosing between a wired and wireless connection depends on your gaming needs and setup. Each option offers unique advantages and considerations. Let’s break it down:
Wired Connection – Stability and No Lag
A wired connection is ideal for gamers who value stability and low latency. It ensures uninterrupted gameplay without worrying about signal drops or battery life.
Advantages:
- No input lag, making it perfect for competitive gaming.
- Reliable and stable connection.
- No need to charge the controller during use.
Disadvantages:
- Limited by cable length, restricting movement.
- Cable clutter in your gaming setup.
When to Choose Wired:
- Wired: Choose wired if you prefer fast, stable connections and typically play near your PC or console.
- Wireless: Choose wireless for casual gaming when convenience and flexibility are more important than top performance.
Wireless Connection – Freedom and Flexibility
Wireless connectivity offers freedom from cables and a cleaner gaming setup. It’s a great choice for casual gaming sessions or when you want to sit further from your PC.
Advantages:
- Freedom to move around without restrictions.
- No cable clutter, keeping your space organized.
Disadvantages:
- Potential for input lag, depending on your Bluetooth signal.
- Requires regular charging of the controller.
When to Choose Wireless:
- Prioritize a cable-free setup for gaming.
- Accept the need for occasional charging of wireless devices.
How to Connect via a Wired Connection
Connecting your Mobile Gaming Corps Switch Controller to your PC using a wired connection is simple and quick. Follow these step-by-step instructions to get started:
Step 1: Gather Your Equipment
- Mobile Gaming Corps Switch Controller
- USB-C cable (usually provided with the controller)
- A PC or laptop with an available USB port
Step 2: Connect the Controller to Your PC
- Plug one end of the USB-C cable into the controller’s port.
- Connect the other end to an available USB port on your PC.
- Once connected, the controller’s indicator light should turn on to confirm the connection.
Step 3: Install Necessary Drivers (If Prompted)
- On Windows: The system typically installs drivers automatically. Wait a few moments for the setup to complete.
- On macOS: No driver installation is usually required.
Step 4: Verify the Connection
- Open the Windows Device Manager to check for the controller under Human Interface Devices.
- Alternatively, test the controller in Control Panel > Devices and Printers by right-clicking the controller icon and selecting Game Controller Settings to ensure button inputs are detected.
Step 5: Configure Controller Settings (Optional)
- For Steam games, navigate to Steam > Settings > Controller > General Controller Settings and enable the Switch Pro Configuration Support option.
Troubleshooting Tips:
- Controller Not Recognized? Try switching USB ports or using a different cable.
- No Response? Restart your PC and reconnect the controller.
- Incorrect Inputs? Recalibrate the controller through game or system settings.
Benefits of Using a Wired Connection:
- Low latency for smoother gameplay
- Reliable and stable connection
- No need to worry about battery life
By following these steps, you’ll have your Mobile Gaming Corps Switch Controller connected and ready for action on your PC. Enjoy lag-free, precise gaming with the simplicity of a wired setup!
Read Also: Dominican Republic vs Jamaica Travel: Which One is Best
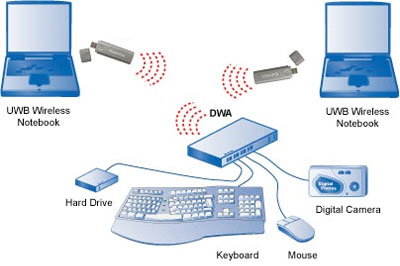
How to Connect via a Wireless Connection

Enjoy the freedom of wireless gaming by connecting your Mobile Gaming Corps Switch Controller to your PC via Bluetooth. Here’s a detailed guide to get you set up quickly and efficiently:
Step 1: Check Your PC’s Bluetooth Compatibility
- Ensure your PC has built-in Bluetooth.
- If it doesn’t, use a Bluetooth USB adapter.
How to Check:
- Open Settings > Devices > Bluetooth & other devices on Windows.
- Look for the Bluetooth toggle. If it’s missing, you’ll need an external adapter.
Step 2: Enable Bluetooth on Your PC
- Go to Settings > Devices > Bluetooth & other devices.
- Turn on the Bluetooth toggle.
Step 3: Put the Controller in Pairing Mode
- Hold down the Pairing Button (usually located near the top of the controller) until the indicator light starts blinking.
- This blinking light indicates that the controller is in pairing mode.
Step 4: Connect the Controller to Your PC
- Click Add Bluetooth or other device on your PC.
- Select Bluetooth from the list of device types.
- When the controller appears as Mobile Gaming Corps Controller or a similar name, select it.
- Wait for the connection confirmation.
Step 5: Test the Connection
- Open Devices and Printers in Control Panel and verify button input under Game Controller Settings.
- Alternatively, test the controller in a game.
Troubleshooting Tips:
- Controller Not Detected? Ensure the controller is in pairing mode and close to your PC.
- Bluetooth Signal Weak? Remove interference from other wireless devices.
- Input Lag? Consider switching to a wired connection if the lag is noticeable.
Enhancing the Wireless Experience:
- Battery Management: Keep the controller charged to avoid disconnections during gameplay.
- Bluetooth Adapter Upgrade: If input lag persists, invest in a high-quality Bluetooth 5.0 adapter.
By following these steps, you’ll enjoy the convenience of wireless gaming with your Mobile Gaming Corps Switch Controller. Say goodbye to cables and game on with freedom and flexibility!
Setting Up Mobile Gaming Corps Switch Controller on Steam
Steam offers built-in support for controllers, making it easier to connect and customize the Mobile Gaming Corps Switch Controller for your favorite games. Follow this step-by-step guide to set up your controller on Steam and unlock a seamless gaming experience:
| Step | Action | Details |
| 1 | Launch Steam | Open and update the Steam client. |
| 2 | Enable Controller Support | Settings > Controller > General Controller Settings. |
| 3 | Configure | Enable config support (e.g., Switch Pro). Optionally, use Nintendo button layout. |
| 4 | Customize Mapping | Define Layout > Map buttons. Adjust sensitivity. Save profile. |
| 5 | Test | Big Picture Mode. Launch game. Confirm input. |
| 6 | Troubleshoot | Check connection, recalibrate, verify game support. |
Enhancing Your Steam Experience:
- Create Multiple Configurations: Save different button layouts for different game genres.
- Optimize Controller Vibration: Adjust the intensity to your preference.
- Use Community Layouts: Browse user-generated layouts for popular games.
By setting up the Mobile Gaming Corps Switch Controller on Steam, you’ll enjoy smoother gameplay and tailored controls for an immersive gaming experience. Game on with precision and customization at your fingertips!
Hardware Alternative – Use a Wireless USB Adapter
If your PC lacks reliable Bluetooth functionality or you’re experiencing connectivity issues, using a wireless USB adapter is an excellent alternative for connecting the Mobile Gaming Corps Switch Controller. Adapters like the 8BitDo Wireless USB Adapter are widely recommended for their ease of use and robust performance.
Step 1: Choose a Compatible USB Adapter
Look for adapters that support a wide range of controllers, including the Mobile Gaming Corps Switch Controller.
Recommended options:
- 8BitDo Wireless USB Adapter
- Mayflash Magic-NS Adapter
- Ensure the adapter supports PC connectivity and works with Bluetooth controllers.
Step 2: Plug in the USB Adapter
- Insert the wireless USB adapter into an available USB port on your PC.
- Wait a few seconds for your system to recognize the device.
Step 3: Put the Controller in Pairing Mode
- Hold the Pairing Button on the Mobile Gaming Corps Switch Controller until the indicator light starts blinking.
- This signals that the controller is in pairing mode.
Step 4: Sync the Controller with the USB Adapter
- Press the pairing button on the USB adapter.
- Wait until the adapter’s light stabilizes to indicate a successful connection.
Step 5: Test the Connection
- Open Control Panel > Devices and Printers to ensure the controller is recognized.
- Launch a game and verify that all button inputs work correctly.
Benefits of Using a Wireless USB Adapter:
- Stronger Signal: Reduces latency and improves connection stability.
- Multi-Device Support: Many adapters support other controller brands as well.
- Plug-and-Play Setup: Simple installation without complicated software configurations.
Troubleshooting Tips:
- No Connection? Ensure both the controller and adapter are in pairing mode simultaneously.
- Input Lag? Try repositioning the adapter to avoid interference.
- Connection Drops? Update the adapter firmware if available.
Why Choose This Option?
Using a wireless USB adapter offers better compatibility and a stable connection compared to standard Bluetooth. It’s a hassle-free solution for those seeking reliable wireless gameplay with the Mobile Gaming Corps Switch Controller.
Software Alternative – Controller Input Wrappers

If you’re having trouble getting your Mobile Gaming Corps Switch Controller to work properly with certain games or applications, using a software solution like a DirectInput-to-XInput wrapper can resolve compatibility issues.
These wrappers translate the input signals from your controller into a format that is universally recognized by most PC games, especially those designed for Xbox controller
What is a DirectInput-to-XInput Wrapper?
A DirectInput-to-XInput wrapper is software that allows controllers designed for DirectInput (such as the Mobile Gaming Corps Switch Controller) to communicate with games that require XInput, the controller standard used by Xbox controllers. These wrappers act as a translator, mapping your controller’s inputs to the expected Xbox controller layout.
Step 1: Download and Install the Wrapper Software
Popular wrappers include:
- XOutput
- reWASD
- DS4Windows (though primarily for PS controllers, it can also be used with some third-party controllers)
- Visit the official website of the chosen software.
- Download the installation file for your version of Windows.
- Run the installer and follow the prompts to complete the setup.
Step 2: Configure the Wrapper
- Launch the wrapper software.
- Select your Mobile Gaming Corps Switch Controller from the list of detected devices.
- Map the controller’s buttons to the Xbox layout. Most wrappers provide pre-configured mappings, but you can adjust them to your liking.
Step 3: Test the Controller
- Open the Windows Game Controllers settings (Control Panel > Devices and Printers > Game Controllers).
- Test the controller to ensure that the button inputs are recognized and properly mapped to the Xbox configuration.
- Launch a game that supports XInput controllers to verify functionality.
Step 4: Fine-Tune the Settings
- Many wrappers allow for advanced customization, such as adjusting the sensitivity of the analog sticks or configuring additional buttons.
- You can also set up custom profiles for different games, saving time when switching between titles.
Troubleshooting Tips:
- Controller Not Detected? Ensure the controller is connected properly and try restarting the wrapper software.
- Incorrect Button Mapping? Double-check the button configuration in the wrapper and make necessary adjustments.
- Lag or Input Issues? Update your wrapper software or try lowering the controller’s polling rate if available in the settings.
Why Use a Software Wrapper?
A software wrapper is an ideal solution if you want to use your Mobile Gaming Corps Switch Controller with older games or those that don’t natively support it. It also allows for fine-tuned customization, ensuring your controller behaves exactly as you want it to during gameplay.
What About Joy-Cons?
If you already own a Nintendo Switch and have Joy-Cons laying around, you might wonder if they can also be connected to your PC. The answer is yes! Joy-Cons can be used with a PC either via a wired or wireless connection. Although they have fewer buttons than the full Switch Pro Controller, they can still offer a functional, compact solution for gaming on your PC. Here’s how to get them set up:
Step 1: Check for Bluetooth Compatibility
To connect Joy-Cons wirelessly, your PC needs Bluetooth capabilities. If your PC doesn’t have Bluetooth, you can use a USB Bluetooth dongle to add the functionality.
Step 2: Pair the Joy-Cons Wirelessly
| Step | Action | Details |
| 1 | Put Joy-Con in Pairing Mode | Hold the Sync button (small, in-laid button between SL and SR buttons) until the LED lights start flashing. |
| 2 | Open Bluetooth Settings on PC | Go to Settings > Devices > Bluetooth & other devices. On Mac, select System Preferences > Bluetooth. Ensure Bluetooth is toggled on. |
| 3 | Add Bluetooth Device | Click “Add Bluetooth or other device”. Select “Bluetooth”. |
| 4 | Select Joy-Con from List | Choose the Joy-Con from the list of available devices (it should appear as “Joy-Con (R)” or “Joy-Con (L)”). |
| 5 | Complete Pairing | Once connected, the LED lights will stop blinking and remain solid. The Joy-Con is now paired. |
| 6 | Confirm Controller Configuration (Switch) | On the Nintendo Switch console, go to Controllers > Change Grip/Order. Press the L/R Buttons as indicated to confirm how the Joy-Con will be used (dual-controller grip or solo horizontal grip). |
Step 3: Connect Using a Wired Connection (Optional)
You can also connect Joy-Cons via USB using a USB-C cable. This allows for immediate plug-and-play functionality on some PCs, especially those running Windows 10 or higher.
Step 4: Test the Controller
- After pairing the Joy-Cons, check that they are working by navigating to Devices and Printers in Control Panel and selecting Game Controllers Settings.
- Launch a game to verify that the button inputs work as expected.
Step 5: Customize Joy-Con Controls
Although the Joy-Con controllers are more compact and feature fewer buttons than the Switch Pro Controller, you can still map the buttons to your liking in Steam.
- Open Steam > Settings > Controller > General Controller Settings.
- Enable Switch Configuration Support to adjust the layout or customize mappings for specific games.
Limitations of Using Joy-Cons
- Smaller Buttons: The Joy-Cons are compact, making the buttons smaller and potentially harder to use for extended gaming sessions.
- Limited Button Layout: Since there are fewer buttons than on the Switch Pro Controller, certain games may not support the full range of inputs.
- Battery Life: Joy-Cons are battery-powered, so you’ll need to charge them during use if they’re connected wirelessly.
Why Use Joy-Cons?
Joy-Cons are a great alternative if you’re looking for a compact controller option and want to use your existing hardware without purchasing a dedicated gaming controller. They’re especially useful for casual gaming sessions or when you need an extra controller for multiplayer games.
Read Also: Techsslash – Stay Ahead with 100+ Expert Tech Insights!
How to Connect Other Game Controllers to Your PC

If you have a different game controller lying around—whether it’s an Xbox, PlayStation, or third-party controller—connecting it to your PC is typically a straightforward process.
Depending on the controller type, you can either use a wired or wireless connection, just like with the Mobile Gaming Corps Switch Controller. Here’s how to connect other popular game controllers to your PC:
Step 1: Xbox Controllers (Wired and Wireless)
Xbox controllers are one of the most compatible controllers with Windows PCs, as they are designed with native support for Windows.
Wired Connection:
- Plug the Xbox controller into your PC via a USB cable (micro-USB for Xbox One or USB-C for Xbox Series X|S).
- Your PC will automatically detect the controller, and you should be able to use it immediately without needing additional software.
Wireless Connection:
- Open Bluetooth settings on your PC (Settings > Devices > Bluetooth & other devices).
- Press and hold the pairing button on the Xbox controller (located on the top of the controller).
- Select the Xbox Wireless Controller from the list of available devices on your PC to complete the pairing.
Alternatively, you can use the Xbox Wireless Adapter for a more stable wireless connection.
Step 2: PlayStation Controllers (Wired and Wireless)
PlayStation controllers, like the DualShock 4 and DualSense, can also be connected to your PC either through a USB cable or Bluetooth. However, native support may require software like Steam or DS4Windows for full functionality.
Wired Connection (DualShock 4 & DualSense):
- Simply plug the controller into your PC using a USB-C cable (for the DualSense) or micro-USB cable (for the DualShock 4).
- Your PC should automatically recognize the controller, but you may need to install Steam or specific drivers for full compatibility.
Wireless Connection (DualShock 4 & DualSense):
- Go to Bluetooth settings on your PC and enable Bluetooth.
- Hold the Share and PS buttons on the controller simultaneously until the light bar starts blinking.
- In your Bluetooth settings, select Wireless Controller to pair the controller with your PC.
You can also use the DualShock 4 USB Wireless Adapter for a more stable connection.
Step 3: Third-Party Controllers (Wired and Wireless)
Third-party controllers, such as those from Logitech, 8BitDo, and others, offer good compatibility with PCs. The connection methods can vary based on the manufacturer.
Wired Connection:
- Simply plug the controller into your PC’s USB port.
- Most third-party controllers will be automatically detected and ready to use, although some may require drivers or software installation from the manufacturer’s website.
Wireless Connection:
- For Bluetooth-enabled controllers, enable Bluetooth on your PC and put the controller in pairing mode.
- Check the controller’s manual for specific pairing instructions (usually a combination of buttons like Start or Pair).
- Select the controller from the list of available devices in your Bluetooth settings.
Step 4: Test the Connection
After connecting any controller, it’s important to test it to ensure it’s functioning correctly. You can do this by:
- Opening Devices and Printers in the Control Panel and selecting Game Controllers to check if the controller appears and functions.
- Launching a game or using Steam’s Big Picture Mode to verify button inputs.
Step 5: Troubleshooting Tips for All Controllers
- Controller Not Recognized? Ensure that your drivers are up-to-date. Check if any software from the controller’s manufacturer is needed.
- Connection Drops? Try reconnecting the controller or switching USB ports for wired controllers. For wireless, make sure the controller is within range and the batteries are charged.
- Unresponsive Buttons? Restart your PC or reconnect the controller, and ensure the controller is properly paired.
Why Use Other Game Controllers?
Using a different controller may be a convenient option if you already own a variety of gaming controllers. It can also offer better ergonomics or specific features (like triggers, thumbsticks, or grip styles) that suit your gaming preferences. With easy compatibility on Windows PCs, using a PlayStation, Xbox, or third-party controller provides flexibility for all types of gamers.
Conclusion – How to connect mobile gaming corps switch controller to pc
Connecting your Mobile Gaming Corps Switch Controller to a PC doesn’t need to be a hassle. Whether you choose a wired connection, wireless Bluetooth, a USB adapter, or software solutions, there are various ways to make it work.
Just follow the steps carefully, and use these troubleshooting tips to resolve any potential issues. With the right connection, you’ll be ready to enjoy all your favorite PC games with your Mobile Gaming Corps Switch Controller in no time!
Read Also:
- Vuianime – A Hub for Anime Enthusiasts!
- Alcohol Denat in Skincare: Benefits, Risks, and Best Practices!
- Dhamaka Zone Celebrity Gossip – Your VIP Pass in 1 Click!
FAQ’s – How to connect mobile gaming corps switch controller to pc
1. Can I use the Mobile Gaming Corps Switch Controller on a PC without additional software?
Yes, you can connect it directly using a USB cable or Bluetooth. Steam provides built-in controller support for easy customization.
2. What is the best connection option for gaming—wired or wireless?
A wired connection ensures zero input lag, ideal for competitive gaming. Wireless offers more flexibility and a cleaner setup.
3. How do I pair the Mobile Gaming Corps Switch Controller via Bluetooth?
Put the controller in pairing mode by holding the pairing button until the light blinks. Then, select it from your PC’s Bluetooth device list.
4. Why is my PC not recognizing the Mobile Gaming Corps Switch Controller?
Try switching USB ports, using a different cable, or updating your Bluetooth driver. Ensure the controller is in pairing mode for wireless connections.
5. Does Steam automatically detect the Mobile Gaming Corps Switch Controller?
Yes, Steam’s built-in controller support can detect and configure it automatically. Enable “Switch Pro Configuration Support” in Steam settings for optimized controls.